
After being unable to get my hands on a Lego Ship in a Bottle for a few weeks and after seeing how impressive it is in real life after seeing a display I thought I’d swear off buying Lego sets for a while. Unfortunately, that didn’t last long because immediately I came across something on Facebook promoting the upcoming Hulkbuster: Ultron Edition Lego set.
After discovering the set I started counting down the days it would be released and when that day came I immediately went down to the nearest Lego Store and bought one. It’s a good thing I went to buy one right away because ever since it came out I have not been able to find them again..
Originally I was going to sit on this set for a while. I have several other toys to photograph and do write-ups on as well as other things I wanted to write about before getting to this one but after realizing that Avengers: Infinity War is coming out soon I figured I should try to take advantage of the sudden surge of people doing all these Avengers and Marvel-related searches.
Considering how Lego is calling this set “Hulkbuster: Ultron Edition” it’s pretty obvious that it is based on the Hulkbuster suit that Tony Stark used in Avengers: Age of Ultron when the Scarlet Witch used her powers to make Bruce Banner Hulk out and attack the other Avengers. If you’re like me and you like digging for backstory or more information (even if it is made up) on things and look through the Marvel Cinematic Universe wiki you’ll learn that this armor is officially designated Mark XLIV (44) and is nicknamed “Veronica” which is supposed to be a reference/joke to the old Archie Comics. The joke is that Bruce Banner’s girlfriend/wife is named Betty and in the Archie Comics, Archie is in a love triangle with two chicks named Betty and Veronica.
If you need some more refreshing of the Hulkbuster armor here are some clips from Avengers: Age of Ultron from where it made its debut.
First we have Tony armoring up.
And now we have Iron Man trying to take on the Hulk.
Before I go forward I just want to say that the idea of Iron Man having a suit of armor designed to specifically take on the Hulk wasn’t something that they just came up with for the Marvel movies. In fact, the first Hulkbuster suit debuted in the Iron Man comics in 1994 and since then has been refined quite a few times and has also been featured in several of the animated series.
This isn’t the first time the Hulkbuster has been recreated in toy form. Do a quick search on Google and you’ll find several different toy versions of it. This also isn’t the first time Lego has made a Hulkbuster, in the past they’ve made smaller versions of it but usually those were part of larger set that was geared more towards kids to play with.

Take a look at the box and you can see that even though it could be played with this is more of a display piece. I mean why else would they include a stand like that?

If the front of the box doesn’t have you sold the back should. I do like how that bottom ribbon depicts all the Hulkbuster’s features which were all shown in Avengers: Age of Ultron.

9 bags. 10 counting that 1 extra bag full of what were the main pieces of the stand. I’m a bit surprised they put those in a separate bag instead of just jumbling them in with the main bags. This thing is made up of 1363 parts and while that it is more than the BB-8 build I did a few month’s ago it is still another one of the more smaller sets I’ve put together.

Stickers. Man, I really wish this didn’t have stickers because I’m a huge stickler for making sure they’re on correctly. I’m also really worried that the glue would eventually wear down and they might peel off.


Here’s the instruction manual. As you can see it’s not that thick. Originally when I was about to start this I was thinking about taking pictures of every single step. But honestly even with a smaller set like this that would still be hundreds of photos and probably isn’t worth it so I’ll just stick with the highlights.


The first couple pages of the instruction manual are dedicated to what you should be done with after each bag.


Bag 1. Judging by the manual I should have the Iron Man minifig and half of the torso completed.


The Iron Man minifig is the very first thing you assemble out of this entire thing. According to the included base this is the Mark 43 armor which is supposed to be the model of armor that Stark wore in Avengers: Age of Ultron. Good job on Lego with maintaining this level of consistency.

I’m really wondering why the Iron Man minifig has a removable helmet. I’m also wondering why if they gave him a removable helmet why they wouldn’t give him a face which makes it look really creepy when you take the helmet off. Why not just make the helmet and head one piece. The only thing I can think of is because Lego minifig heads have a hole in them so if a kid swallows them they’ll still be able to breathe even if it gets lodged in their throat, and I guess if they put a hole in the helmet it would look dumb Although what happens if a kid swallows the head while it’s wearing Iron Man’s helmet?


The torso build itself is pretty straight-forward. Nothing that weird or complicated about it.

1 thing that did make me wonder is that this thing has a light in the center of the chest. I know this is probably meant to represent either the unibeam or the arc reactor but once this thing is fully assembled the button to activate the light is no longer reachable. I’m wondering if this was a mistake on lego’s part or did I just screw up putting mine together.


Bag 2.


This is a pretty straight-forward bag. Essentially you just finish assembling the torso as well as part of the crotch.


Bag 3 is just more of the same.

At this point you’re just adding the details to the torso as well as building the thighs.


Bag 4 is the left lower leg and foot as well as the fire extinguisher.

The fire extinguisher is a simple piece It’s only made out of 7 pieces and a sticker. Lego probably threw this in here as a throwback to the first Iron Man movie when Tony is testing his new armor and he kept crashing and the robot arm kept spraying him with the fire extinguisher.

I’m a bit surprised they would dedicate an entire bag to just half of one leg. There are a lot of pieces to this 1 leg but still I feel they could have just thrown both legs into one bag.


Bag 5 is the right leg.

It’s pretty much exactly what you would expect a right leg to be: The mirror image of the left leg.

At first glance the legs are pretty much identical but there are a few subtle details that let you know which foot is which.


Bag 6: The right arm.


Like the legs are made up of quite a number of pieces and like the legs I’m surprised that they would dedicate an entire bag just to one limb. Unlike the legs however the arms are very distinctive from one another with each one having it’s own unique hand. This is probably another throwback to the movie where movie Hulkbuster had different arms for different functions.
– Repulsor hand for blasting the Hulk.
– Jackhammer hand for punching the Hulk repeatedly.
– And a restraining hand that Iron Man uses to entangle the Hulk’s hand and hold him in place.

Judging by the thing in the palm of the hand I’m guessing this is supposed to be the repulsor blasting hand.

Here is the arm mounted on the rest of the body.


Bag 7: The left arm, helmet and the Veronica unit. I’m a bit curious why the instructions insist the arms be stuck straight out to the side like the Hulkbuster is being crucified.


Like I said before the left arm is clearly different from the right arm.

Considering how the left arm doesn’t’ have a repulsor in the palm and the fingers are unable to make a fist supposed to represent the arm Tony used to try to restrain the Hulk. This thing also has a mechanism on it to make the fingers spin.


The helmet is like 3 pieces and is so simple to attach even a monkey could do it.

Bag 7 also has you build a mini version of the module where all the pieces come from. I’m really wishing they made it bigger to help improve the movie realism.


Bag 8 pretty short. It’s just the base and this car thing.

Seriously what the hell is this thing supposed to be?


Here’s the base. Good touch with the work table on the side. I really like how they included stickers to represent the displays instead of just making them blank. I also like how they found a way to stylistically incorporate the information card to the base. In so many sets I’ve seen the information cards always look like they’ve just been shoe horned on there. Notice how they spelled “armor” with a u.


The 9th and final bag is the robotic assembly arms.

The use of the arms is a throwback to the early Marvel movies where Tony needed all the machinery to assemble the Iron Man suit around him.

Here are the arms attached to the base. This is how they were positioned in the instruction manual but the way this thing is designed they can be moved to pretty much anywhere along the sides of the base


Another arm is also in the 9th bag. The way this is assembled makes it pretty modular so it’s not that difficult to pull off one arm and swap it for another. This just further illustrates how much attention to detail Lego put into this set since this is something that the movie Hulkbuster can do.

Here is everything all finished up.

The Iron Man minifig can fit inside the suit. In all the incarnations it has been shown in, comics, cartoons, and movies, the Hulkbuster suit was always shown as an exo-armor add-on that was fitted over Iron Man’s existing armor instead of being it’s own separate suit.


When this first came out I remember coming across a review online and they were criticizing the use of blue pegs on this thing. I really don’t understand why Lego couldn’t color match the pegs since the real Hulkbuster doesn’t have any blue anywhere on them.
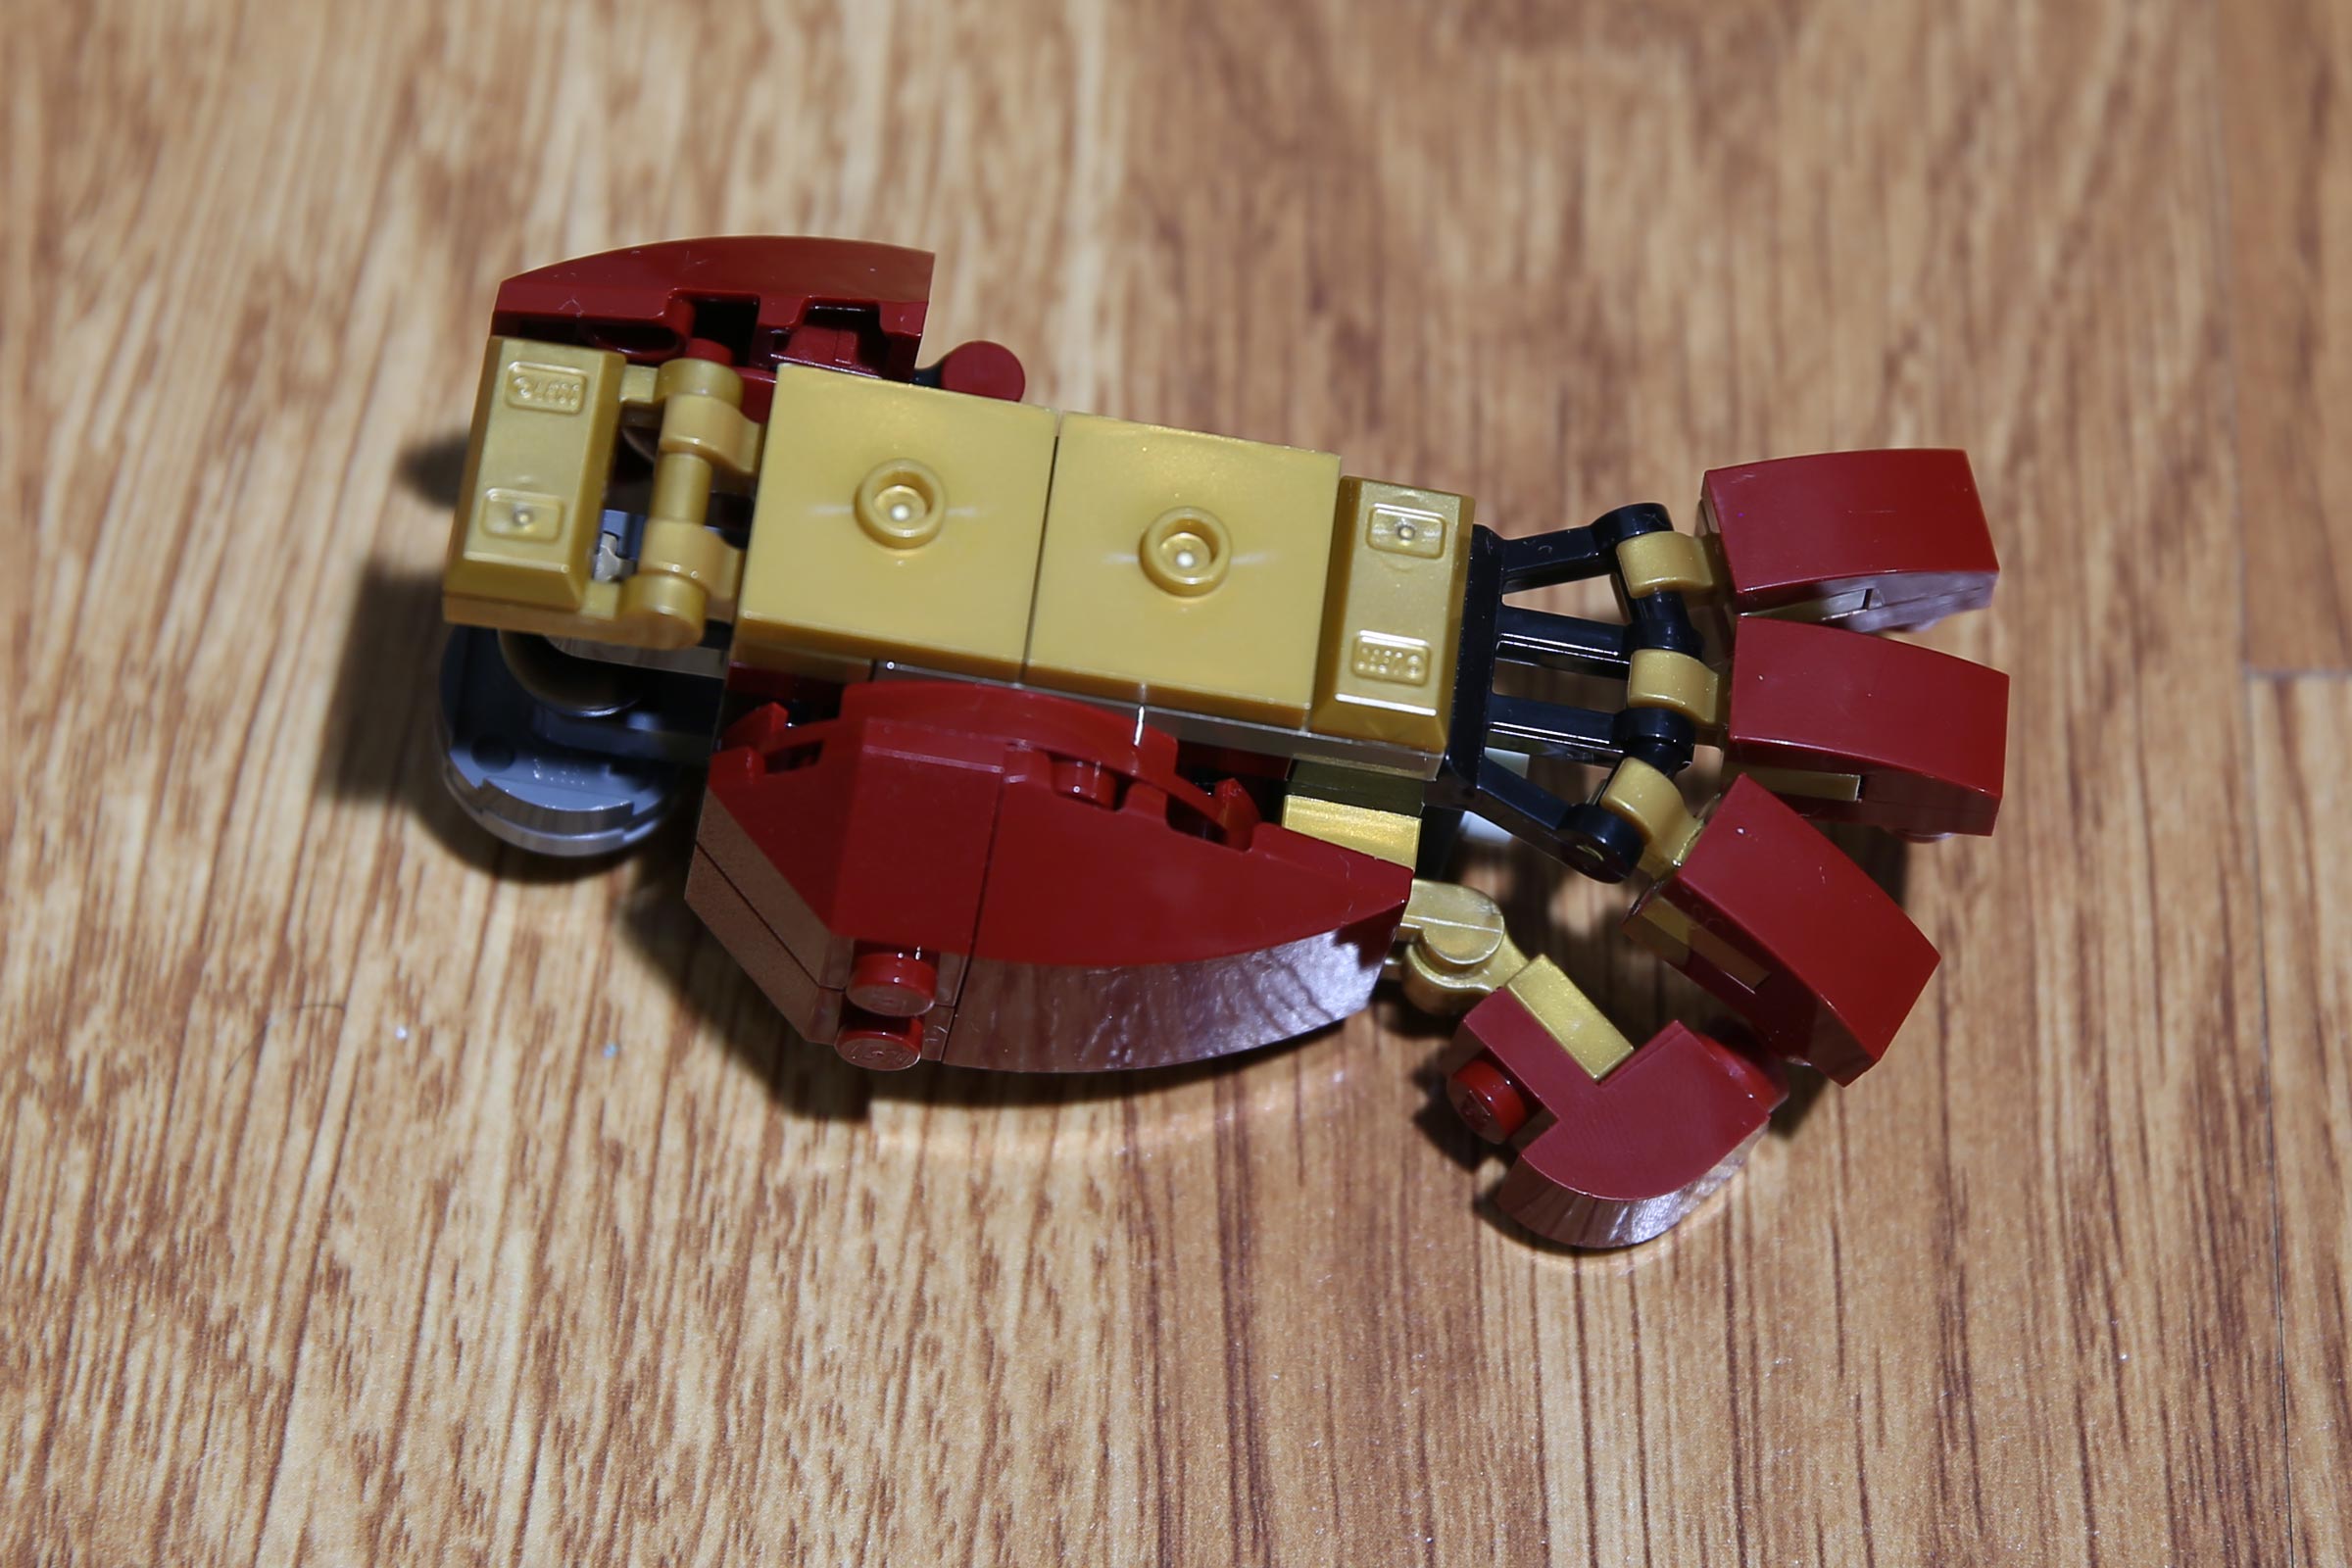
At this point I’ll just leave you with the extra pictures I took showing off the detail on this thing.


Thanks for checking this post out.


You must be logged in to post a comment.