
When I was a kid I didn’t care much for Legos. I remember my dad sent me a generic Lego bucket full of random pieces when he was in Japan but that’s all I really I had back then.
Today, Lego has been coming out with a lot of cool stuff both original or licensed items and it is because they have so much cool stuff that I have started buying so many sets lately.
The SHIELD Helicarrier was a set I had my eye on ever since it was first announced. I thought it was a cool set and I also thought documenting the build process would be a good post for my blog which at the time was my original itssamuraijosh.wordpress.com site. I ended up putting off posting it at the time I was in the process of finding a new apartment and also I was at a bit of a crossroads where I was trying to figure out what to do with my life. In the end I think I was glad procrastinating posting it because something like it needs a real website and not some .wordpress.com blog.
At almost 3,000 pieces the Helicarrier was quite a build to do. I think it took me a little over a month to do. This was because at the time I still had an apartment I lived in during the week so I didn’t have to commute to work everyday and the Helicarrier was at my parents’ house because I didn’t care much for having too many personal effects at my apartment so I only worked on it when there.
Here’s my documentation of the Helicarrier build. I’m hoping I can remember most of it considering I finished it almost three years ago. Also I apologize about the quality of some of my photos. I did this build during a point in my professional career when I was still trying to figure out how to use an SLR camera properly on manual.

Here’s the box. Between the fact that this set is made up of 2996 pieces and that it says “Ages 16+” you can tell that this is not a set for little kids. I kind of wish I took a picture of this next to something for scale so you can see how big the box is.

Here are all the bags. There were like 14 sets of bags with each set made up of 2 or 3 individual bags.


Here’s the instruction manual. As you can see here it is pretty freaking thick.

Going through the instructions the first thing that you build is this SHIELD logo thing which is also the minifig stand.

The next thing to build is the stand and information plaque for the actual Helicarrier. This is a departure from other sets I’ve done in the past where the stand and information plaque is saved for last.

Here is the first completed piece of the Helicarrier. It is the front of the ship/bridge. Looks pretty lame now but just wait it’ll look cool later.

The first minifig that you finish is Hawkeye complete with a bow.


The next couple bags of pieces consist of getting the basic shape of the Helicarrier built out as well as some of the internal details and the gear mechanism that will get the rotors moving.

Here’s the centerpiece of the gear system which will get all the rotors moving.


Also here’s what the interior of the bridge looks like. The SHIELD logo on the back is a good touch but I’m honestly surprised they’d put so much detail into such a hidden part of the Helicarrier.

Once the basic shape of the Helicarrier and the interior of the Helicarrier is finished it’s time to work on the exterior. Here is the Helicarrier with some of the side plates on.

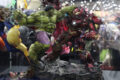
Another minifig, this one is Maria Hill. It disturbs me that this minifig actually looks like Cobie Smulders.
At this point it’s time to work on the rotors.

First step is to get the wings built.

Then you slap them on the Helicarrier.

Then you put the rotor together.

And then you install the rotor making sure it’s hooked up to the gear system.

For some weird reason you don’t do all 4 rotors at once. You do two first, then you take a break from it to put the Captain America together. It really creeps me out how accurately this thing looks like Chris Evans.


After Captain America is found and put together you put the other two wings and rotors on making the Helicarrier ready for flight.

After the rotors you have the Nick Fury minifig.


At this point it’s time to get the flight deck built.

As well as more side plates…

And the engines…

Here is the Black Widow minifig.

With the Scarlet Witch minifig done that’s all the minifigs done so I can start putting the minifig stand to use as well as hopefully stop having nightmares about these things.

After the minifigs are done it’s time to get the second flight deck assembled.

Here are the mini minifigs which are supposed to crew the Helicarrier. Notice how there is a Captain America, Iron Man, Hawkeye, and Nick Fury mini minifigs.

Fuel tanker, forklifts, and barriers for the flight deck. Building these makes you think “Damn this thing is really detailed.”
Since the Helicarrier is a flying aircraft carrier it needs aircrafts to carry.

Here are some Quinjets just like from the comicbooks and movies.


Notice how the Quinjets are VTOL capable.

Here are some other aircrafts. I’m guessing these are supposed to be standins for real fighter jets like F22s.

Here’s what I’m guessing is supposed to be the control tower for the flight deck.


Note how its complete with mini minifigs and machinery, another testament to the amount of detail that is put into this thing.

Next thing to do is put this antenna thing on.

And the final steps consist of putting on little details like these little things on which are supposed to be stand ins for cargo crates and containers.
And just like that the Helicarrier is finished.


You must be logged in to post a comment.